1 Introduktion till MS Access 2010, 2013, 2016 och 2019 självstudier
Välkommen till MS Access handledning. Denna handledning är utformad för att få användaren igång med MS Access (hädanefter helt enkelt "Access") på ett snabbt sätt. De fyra grundläggande modulerna i Access visas:Tabeller, Formulär, Rapporter och Frågor. Först diskuteras ett affärsexempel som ger en bakgrund för att utveckla en enkel databas.
Det antas att användare av denna handledning är skickliga i att arbeta med Microsoft Windows XP/Vista/Win7/Win10, etc. och med MS Excel. Detta inkluderar användning av tangentbord och mus. Handledningen är baserad på Microsoft Access som är en del av Microsoft Office Professional-sviten som även inkluderar MS Excel, MS Word och MS Powerpoint.
Denna handledning täcker MS Access 2007, 2010, 2013, 2016 och 2019 som har ett gemensamt gränssnitt ("bandfältet" överst) som skiljer sig från tidigare versioner. Om du är intresserad av att arbeta med MS Access ’97 eller 2000, vänligen besök Microsoft Access Tutorial – Täcker webbsidan MS Access ’97 och 2000.
Handledningen börjar med en kort översikt över Relationella databaser . Majoriteten av databashanteringssystem som används idag är baserade på vad som kallas relationsdatabasmodellen. Access är ett relationsdatabashanteringssystem. Vi beskriver sedan ett affärsexempel och ger en översikt över den databas och applikationer vi vill utveckla. I avsnitten som följer ger vi steg-för-steg-instruktioner för att skapa tabeller, datainmatningsformulär, rapporter och frågor för applikationen.
1.1 Avsedd målgrupp
Denna handledning är avsedd för studenter som precis har börjat med MS Access-databashanteringssystemet.
1.2 Förutsatta kunskaper
Denna handledning förutsätter att studenten är bekant med den grundläggande användningen av en persondator och Windows 2000, Windows XP, Windows Vista eller Windows 7. Specifika färdigheter som krävs för denna handledning är:
- Användning av mus och tangentbord
- Öppna och spara filer på hårddisken och på USB-minne (minne) till exempel
- Hantera filer i allmänhet inklusive skillnaden mellan enhetsbokstäver, hårddisk, etc.
- Köra program från Windows Start-meny
- Minimera, maximera och ändra storlek på fönster
Eleven bör ha ett USB-minne (thumb drive) eller annan bärbar minnesenhet tillgänglig för att lagra sina filer som kommer att skapas under denna handledning.
1.3 Köra Microsoft Access på en Apple Mac
En fråga som kan möta vissa studenter är det faktum att MS Access endast körs under Windows operativsystem (som Windows XP, Vista eller Windows 7). Om du har en MacBook, iMac eller annat Apple-system som kör MacOS som använder en Intel-processor, finns det några möjliga alternativ du kan prova. Många moderna Apple-datorer som använder Intel CPU kan köra Windows operativsystem. Observera att du behöver en lagligt licensierad kopia av Windows operativsystem för att göra detta. Det finns två huvudsakliga sätt att åstadkomma detta:
- Du kan ställa in din Mac för "Dual Boot" både MacOS X och Windows. En produkt som kan aktivera detta är Apple BootCamp-programvaran.
- Du kan köra Windows OS "sida vid sida" med Mac OS X med en "virtuell" dator som VirtualBox
Innehållsförteckning
- 1 Introduktion till MS Access Tutorial
- 1.1 Avsedd målgrupp
- 1.2 Förutsatta kunskaper
- 1.3 Köra Microsoft Access på en Apple Mac
- 2 Kort översikt över relationsdatabaser och databasapplikationer
- 3 Ett affärsexempel
- 4 Starta Microsoft Access
- 4.1 Granskning av att starta Microsoft Access
- 5 Skapa och visa tabeller
- 5.1 Skapa en tabell med designvyn
- 5.2 Övning:Skapa en tabell
- 5.3 Visa och lägga till data i en tabell
- 5.4 Övning:Lägga till data i en tabell
- 5.5 Skapa relationer mellan tabeller
- 5.6 Granskning av att skapa och visa tabeller
- 6 Skapa och köra frågor
- 6.1 Enkeltabellsfrågor
- 6.2 Övning:Enkeltabellsfrågor
- 6.3 Flera tabellfrågor
- 6.4 Övning:Flera tabellfrågor
- 6.5 Granskning av att skapa och köra frågor
- 7 Skapa och köra datainmatningsformulär
- 7.1 Skapa ett enstaka tabellformulär med hjälp av guiden
- 7.2 Övning:Skapa ett enda tabellformulär
- 7.3 Granskning av att skapa och köra ett datainmatningsformulär
- 8 Skapa och köra rapporter
- 8.1 Skapa en enstaka tabellrapport med hjälp av guiden
- 8.2 Övning:Skapa en enskild tabellrapport
- 8.3 Granskning av att skapa och köra en rapport
- 9 Skapa och köra ett huvud-/detaljformulär (formulär med ett underformulär)
- 10 Skapa och driva en växel
- 11 Skapa och köra ett navigeringsformulär
- 11.1 Övning:Ändra ett navigeringsformulär
- 11.2 Ställa in navigeringsformuläret som standard
- 12 självstudiesammanfattning och avancerade ämnen
Nästa sida ger en kort introduktion till relationsdatabaser.
2 Kort översikt över relationsdatabaser och databasapplikationer
De första databaserna som implementerades under 1960- och 1970-talen var baserade på antingen platta datafiler eller de hierarkiska eller nätverksanslutna datamodellerna. Dessa metoder för att lagra data var relativt oflexibla på grund av deras stela struktur och stora beroende av applikationsprogram för att utföra även den mest rutinmässiga bearbetningen.
I slutet av 1970-talet, relationella databasmodellen som har sitt ursprung i den akademiska forskarvärlden blev tillgänglig i kommersiella implementeringar som IBM DB2 och Oracle. Relationsdatamodellen specificerar data som lagras i relationer som har några relationer bland dem (därav namnet relationell ).
I relationsdatabaser som Sybase, MySQL, Oracle, IBM DB2, MS SQL Server och MS Access lagras data i tabeller består av en eller flera kolumner (Access kallar en kolumn ett fält ). Data som lagras i varje kolumn måste vara av en enda datatyp som tecken (kallas ibland en "sträng"), nummer eller datum. En samling värden från varje kolumn i en tabell kallas en post eller en rad i tabellen.
Olika tabeller kan ha samma kolumn gemensam. Den här funktionen används för att explicit specificera en relation mellan två tabeller. Värden som visas i kolumn A i en tabell delas med en annan tabell.
Nedan finns två exempel på tabeller i en relationsdatabas för en lokal bank:
Kundtabell
| Kund-ID | Förnamn | Efternamn | Gatuadress | Stad | Stat | Zip |
|---|---|---|---|---|---|---|
| Nummer | Tecken | Tecken | Tecken | Tecken | Tecken | Tecken |
| 1001 | Joseph | Smith | 123 Lexington | Smithville | KY | 91232 |
| 1002 | Alberta | Jones | 12 Davis Ave. | Smithville | KY | 91232 |
| 1003 | Nathanial | Yxa | 443 Grinder Ln. | Broadville | GA | 81992 |
| 1004 | Paulina | Builder | 661 Parker Rd. | Streetville | GA | 81990 |
Kontotabell
| Kund-ID | Kontonummer | Kontotyp | Öppningsdatum | Saldo |
|---|---|---|---|---|
| Nummer | Nummer | Tecken | Datum | Nummer |
| 1001 | 9987 | Kontrollerar | 10/12/1989 | 4000,00 |
| 1001 | 9980 | Besparingar | 10/12/1989 | 2000,00 |
| 1002 | 8811 | Besparingar | 01/05/1992 | 1000,00 |
| 1003 | 4422 | Kontrollerar | 12/01/1994 | 6000,00 |
| 1003 | 4433 | Besparingar | 12/01/1994 | 9000,00 |
| 1004 | 3322 | Besparingar | 08/22/1994 | 500,00 |
| 1004 | 1122 | Kontrollerar | 1988-11-13 | 800,00 |
Kundtabellen har 7 kolumner (kund-ID, förnamn, efternamn, gatuadress, stad, stat och postnummer) och fyra rader (eller poster) med data. Tabellen Konton har 5 kolumner (Kund-ID, Kontonummer, Kontotyp, Öppnad datum och Saldo) med 7 rader med data.
Var och en av kolumnerna överensstämmer med en av tre grundläggande datatyper :Tecken, nummer eller datum. Datatypen för en kolumn anger vilken typ av datavärden som kan lagras i den kolumnen.
- Number – får bara lagra siffror, eventuellt med en decimalkomma. Kan vara positiv eller negativ.
- Tecken – kan lagra siffror, bokstäver och skiljetecken. Access anropar denna datatyp Text .
- Datum – kan endast lagra datum och tid.
I vissa databasimplementeringar finns andra datatyper såsom bilder (för bilder eller annan data). De tre ovanstående datatyperna används dock oftast.
Observera att de två tabellerna delar kolumnen Kund-ID och att värdena för kolumnen Kund-ID i Kund-tabellen är desamma som värdena i kolumnen Kund-ID i Konto-tabellen. Detta förhållande tillåter oss att specificera att kunden Nathanial Axe har både ett check- och ett sparkonto som båda öppnades samma dag:1 december 1994.
Ett annat namn som ges till en sådan relation är Master/Detail . I en huvud-/detaljrelation kan en enda huvudpost (som Customer 1003, Nathanial Axe) ha många detaljposter (de två kontona) kopplade till sig.
I ett huvud-/detaljförhållande är det möjligt att en masterpost existerar utan några detaljer. Det är dock omöjligt att ha en detaljpost utan en matchande masterpost. Till exempel kan en kund inte nödvändigtvis ha någon kontoinformation alls. Men all kontoinformation måste kopplas till en enda kund.
Varje tabell måste också ha en speciell kolumn som kallas nyckeln som används för att unikt identifiera rader eller poster i tabellen. Värden i en nyckelkolumn (eller kolumner) får aldrig dupliceras. I ovanstående tabeller är kund-ID nyckeln för kundtabellen medan kontonummer är nyckeln för kontotabell.
3 Ett affärsexempel
I det här avsnittet kommer vi att skissera ett affärsexempel som kommer att användas som grund för exemplen genom hela handledningen. I organisationer utförs jobbet med att analysera verksamheten och bestämma lämplig databasstruktur (tabeller och kolumner) vanligtvis av Systemanalytiker . En systemanalytiker samlar in information om hur verksamheten fungerar och kommer att bilda en modell av datalagringskraven. Från denna modell kommer en databasprogrammerare att skapa databastabellerna och sedan arbeta med applikationsutvecklarna för att utveckla resten av databasapplikationen.
För den här handledningen kommer vi att överväga en enkel bankverksamhet. Banken har många kunder som öppnar och har ett eller flera konton. För varje kund sparar vi deras namn och adress. Vi tilldelar dem också ett unikt kund-ID. Vi tilldelar denna unika identifierare både för bekvämlighet och för noggrannheten. Det är mycket lättare att identifiera en enskild kund med hjälp av deras kund-ID snarare än att slå upp deras fullständiga namn och adress. Dessutom är det möjligt för banken att ha två kunder med samma namn (t.ex. Bill Smith). I sådana fall kan det unika kund-ID alltid användas för att skilja dem åt.
På liknande sätt tilldelas alla konton ett unikt kontonummer. Ett konto kan vara antingen ett checkkonto eller ett sparkonto. Sparkonton tjänar ränta men de enda transaktioner som är tillåtna är insättningar och uttag. Checkkonton ger ingen ränta. Vi behåller datumet då kontot öppnades. Detta hjälper oss att spåra våra kunder och kan vara användbart för marknadsföringsändamål. Slutligen behåller vi det aktuella saldot på ett konto.
I föregående avsnitt gav vi strukturen och några exempeldata för Kundtabellen och Kontotabellen. Dessa kommer att användas för att stödja datalagringsdelen av vår bankapplikation.
Databasapplikationer
I alla databasapplikationer kräver var och en av tabellerna ett sätt att få in data i dem och för att hämta och ändra data vid ett senare tillfälle. Det primära sättet att få in data i tabeller är att använda datainmatningsformulär. De primära sätten att få tillbaka data från tabeller eller att visa data i tabeller är att använda frågor eller rapporter. I en komplett databasapplikation länkas alla formulär och rapporter samman i ett navigeringsformulär – en enda sida som kommer att ha länkar till var och en av delarna i applikationen. En stor databasapplikation kan ha dussintals datainmatningsformulär och rapporter.
För den här handledningen kommer vi att skapa ett datainmatningsformulär för varje tabell, en fråga för varje tabell och en rapport för varje tabell.
I följande avsnitt kommer vi först att introducera hur man startar Access och hur man skapar en ny databas.
4 Starta Microsoft Access
Som med de flesta Windows-program kan Access köras genom att navigera i Start-menyn i det nedre vänstra hörnet av Windows-skrivbordet.
För att starta Access, klicka på Start-knappen, sedan Program-menyn, gå sedan till Microsoft Office-menyn och klicka slutligen på menyalternativet Microsoft Access. MS Office Professional-menyn visas nedan.
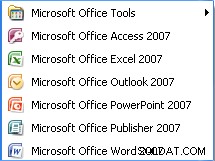
Observera att detta arrangemang av menyer kan variera beroende på hur MS Office installerades på datorn du använder.
När Access körs kommer en första skärm att visas:
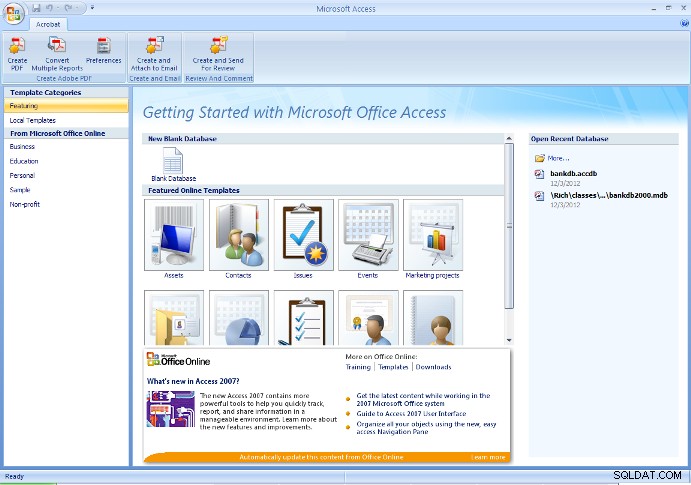
Från den här startskärmen kan användaren skapa en ny databas (antingen tom eller med några tabeller skapade med databasguiden), eller öppna en befintlig databas.
I allmänhet bör en ny, tom databas skapas första gången man påbörjar ett projekt. Efter det, använd Öppna befintlig databas alternativet för att öppna den tidigare skapade databasen igen.
Varning – Om du tidigare har skapat en databas och sedan skapar den igen med samma namn, kommer du att skriva över allt arbete du har gjort.
För den här handledningen, om du går igenom dessa steg för första gången, välj alternativet att skapa en ny, tom databas som visas i bilden ovan.
I Access 2007 klickar du på den runda Office-knappen i det övre vänstra hörnet och väljer Nytt från rullgardinsmenyn. Fyll i Filnamn som bankdb.accdb och klicka på knappen Skapa för att skapa databasen som i bilden nedan.
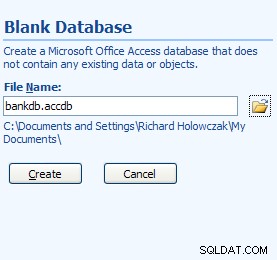
Ny databasskärm för Access 2007
I filnamnet ovan är bankdb namnet som valts för denna speciella databas och .accdb är filnamnstillägget för Microsoft DataBase 2007, 2010 och 2013 filer.
Det är tillrådligt att hålla databasens namn (bankdb i exemplet ovan) relativt kort och inte använda mellanslag eller andra skiljetecken i databasens namn. Namnet på databasen bör också återspegla databasens innehåll.
När den nya databasen har skapats visas följande huvudskärm för åtkomst:
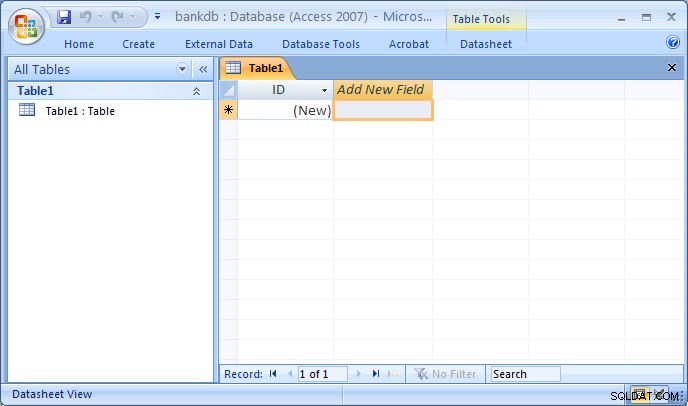
Skärmlayouten för MS Access 2007 skiljer sig markant från tidigare versioner. De flesta flikarna längst upp på skärmen har arrangerats om. Dessutom växlar standardhuvudskärmen efter att en ny databas har skapats automatiskt till designvyn för att skapa en ny tabell.
Följande flikar visas högst upp på skärmen:
- Flik Hem – Kontroller för att ändra teckensnitt, utföra frågor, kopiera/klistra in/klippa ut data, etc.
- Fliken Skapa – Kontroller för att skapa tabeller, formulär, rapporter etc.
- Fliken Extern data – Kontroller för att ladda data från andra datakällor till MS Access.
- Fliken Databasverktyg – Kontroller för hantering av databaser (säkerhet, växel, etc.)
- Fliken Design – Detta kommer att visas när du designar en ny tabell, formulär, rapport, etc.
Observera att gränssnitten för Access 2007, 2010 och 2013 alla är lika, även om versionen du använder kan se något annorlunda ut än bilderna som ingår i den här handledningen.
4.1 Granskning av att starta Microsoft Access
Så här startar du Microsoft Access:
- Använd Start-knappen i aktivitetsfältet för att öppna:Program -> MS Office -> Microsoft Access
- Om du vill skapa en ny databas väljer du Tom databas och ange ett nytt filnamn för databasen. Se till att använda ett beskrivande namn för den nya databasen. Klicka på OK-knappen för att skapa den nya databasen.
- Om du vill öppna en befintlig databas väljer du Öppna en befintlig databas , markera Fler filer... och klicka på OK-knappen. Navigera sedan till enheten, markera den befintliga databasfilen på hårddisken eller USB-enheten och klicka på OK-knappen igen för att öppna databasen.
För att avsluta Access, dra ned Arkiv-menyn (eller Office-menyn) och välj menyalternativet Avsluta.
5 Skapa och visa tabeller
Tabeller är huvudenheterna för datalagring i Access. Kom ihåg att en tabell består av en eller flera kolumner (eller fält ) och att en given kolumn kan förekomma i mer än en tabell för att indikera ett samband mellan tabellerna.
Från affärsexemplet som diskuterades tidigare drog vi slutsatsen att två tabeller skulle vara tillräckliga för att lagra data om kunder och deras bankkonton . Vi ger nu steg-för-steg-instruktionerna för att skapa dessa två tabeller i Access.
Det finns ett antal sätt att skapa en tabell i Access. Access tillhandahåller guider som guidar användaren genom att skapa en tabell genom att föreslå namn på tabeller och kolumner. Det andra huvudsakliga sättet att skapa en tabell är att använda Designvyn för att manuellt definiera kolumnerna (fälten) och deras datatyper.
Medan att använda guiderna är ett snabbt sätt att skapa tabeller, har användaren mindre kontroll över kolumnnamnen (fälten) och datatyperna. I den här handledningen kommer vi att beskriva stegen för att skapa en tabell med Designvyn . Eleverna uppmuntras att experimentera på egen hand med hjälp av guiden Skapa tabell.
5.1 Skapa en tabell med designvyn
För att skapa en tabell i Access med hjälp av designvyn, utför följande steg:
- I Access 2007, 2010 och 2013 borde fliken Skapa ny tabell redan vara markerad och en ny tabell med namnet tabell1 skapas. Om så inte är fallet, klicka på Skapa fliken och klicka på Tabell ikon. Dra sedan ned Visa menyn och välj Designvy .

- Tabelldesignvyn visas. Fyll i Fältnamn , Datatyp och Beskrivning för varje kolumn/fält i tabellen. Fältet Kund-ID fylls i nedan:
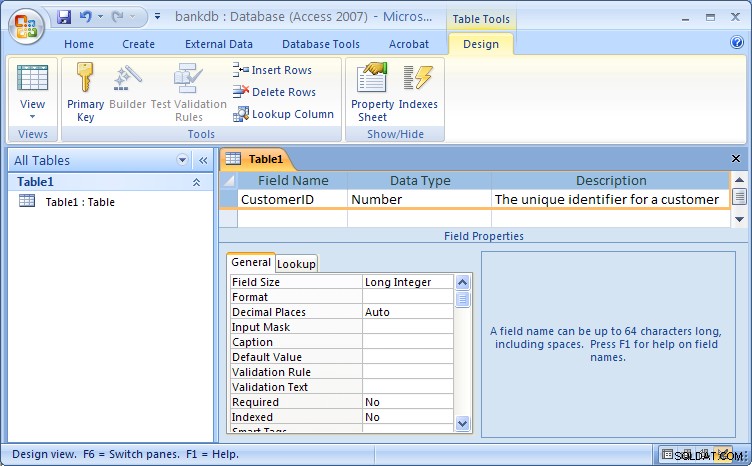
Table Design View for Access 2007Observera att standardnamnet för tabellen är Tabell1 . I ett senare steg kommer vi att tilldela den här tabellen ett lämpligt namn.
Fyll i informationen för fälten enligt följande:
Fältnamn Datatyp Beskrivning Kund-ID Nummer Den unika identifieraren för en kund Förnamn Text Kundens förnamn Efternamn Text Kundens efternamn Gatuadress Text Kundens gatuadress Stad Text Kundens stad Tillstånd Text Kundens hemstat Zip Text Kundens postnummer En bild som visar designvyn med den nya tabelldefinitionen ifylld ges nedan:

Nästa steg är att definiera nyckeln för tabellen och att spara tabellen.
- Nu när alla fält har definierats för tabellen bör en primärnyckel definieras. Kom ihåg att den primära nyckeln kommer att användas för att unikt identifiera en post i tabellen (i detta fall en kund). Markera Kund-ID och klicka på knappen Primärnyckel i knappraden
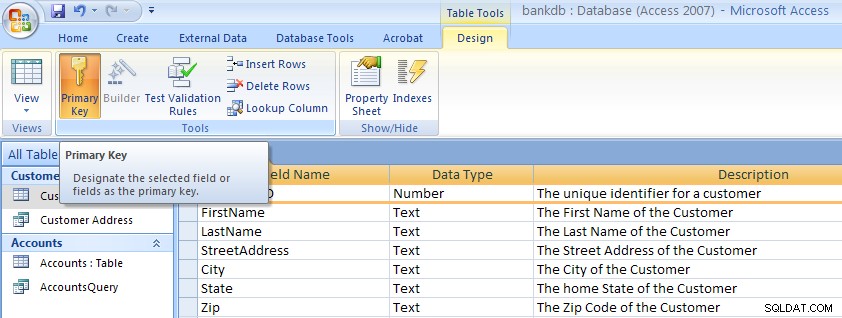 Lägg märke till att en liten nyckel visas bredvid fältnamnet på vänster sida.Obs:För att ta bort en primärnyckel , upprepa helt enkelt denna procedur för att stänga av primärnyckeln.
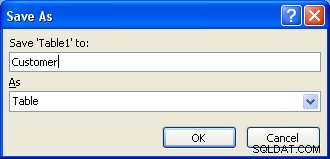
- Som ett sista steg måste tabellen sparas. Dra ner Office-menyn och välj menyalternativet Spara som. En dialogruta visas där namnet på den nya tabellen ska anges. Observera att Access ger ett standardnamn som Tabell1 eller Tabell2 . Skriv bara över detta standardnamn med tabellens namn. För det här exemplet, namnge tabellen:Kund Klicka sedan på OK-knappen.
Vid det här laget har den nya kundtabellen skapats och sparats.
En notering om namngivning av fält (kolumner) i MS Access
När man definierar fälten (kolumnerna) för en tabell är det viktigt att använda fältnamn som ger en tydlig förståelse av datainnehållet i kolumnen. Anger fältet CNO till exempel ett kundnummer eller ett containernummer ?
Fältnamn i Access kan vara upp till 64 tecken långa och kan innehålla mellanslag. Men användning av blanksteg i fältnamn och tabellnamn avråds starkt . Om du vill göra fältnamn lättare att läsa, överväg att använda ett understreck för att separera ord. Var dock säker på att inga mellanslag visas före eller efter understrecket.
Följande tabell sammanfattar några olika sätt att ge fältnamn:
| Beskrivning | Dåligt | Bra |
|---|---|---|
| Unik identifierare för en kund | CID | Kund-ID eller Kund-ID |
| Beskrivning av en produkt | PDESC | Produktbeskrivning |
| Anställds hemtelefonnummer | Employee_home_telephone_number | Hemtelefon |
| Bankkontonummer | BA# | Kontonummer |
5.2 Övning:Skapa en tabell
Skapa konton genom att följa samma steg som användes för att skapa kundtabellen.
- Klicka på fliken Skapa och klicka sedan på Tabell knapp.
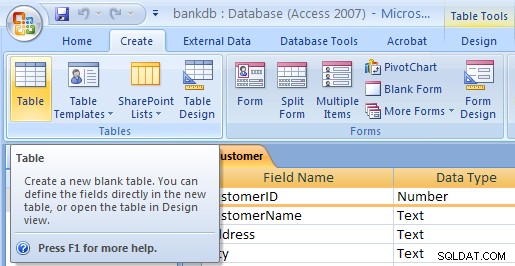
- Dra ner menyn Visa och välj Design. Tabelldesignvyn visas. Fyll i Fältnamn , Datatyp och Beskrivning för varje kolumn/fält i tabellen Konton.
Fältnamn Datatyp Beskrivning Kund-ID Nummer Den unika identifieraren för en kund Kontonummer Nummer Den unika identifieraren för ett bankkonto Kontotyp Text Typen av konto (Kontroll, besparingar, etc.) Öppningsdatum Datum Datumet då kontot öppnades Saldo Nummer Det aktuella saldot (pengar) på detta konto (i USD) En bild som visar designvyn med den nya tabelldefinitionen ifylld ges nedan:
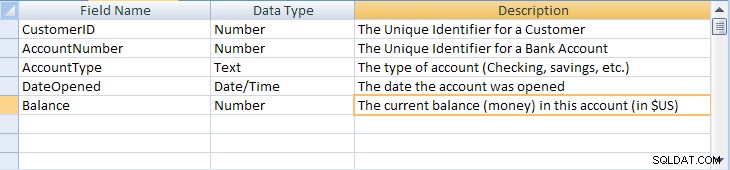
- Definiera en primärnyckel för tabellen Konton. Klicka på Kontonummer fältet med Höger musknapp och välj Primärnyckel från popup-menyn.
- Spara den nya kontotabellen genom att dra ned Arkiv-menyn och välja menyalternativet Spara. Fyll i namnet på tabellen:Konton Klicka sedan på OK-knappen.
Observera att det finns ett antal ytterligare steg man kan vidta för att förbättra och försköna tabeller i MS Access, inklusive att specificera standardvärden, skapa uppslagsvärden och maskera dataingångar för att följa ett specifikt mönster. Detaljerna är inte viktiga för denna aktuella handledning, men om du är intresserad, kolla in sidan Advanced MS Access Table Design som länkas här.
5.3 Visa och lägga till data i en tabell
Data kan läggas till, raderas eller ändras i tabeller med en enkel kalkylbladsliknande display. För att visa den här vyn av en enskild tabells data, markera namnet på tabellen och dubbelklicka sedan på tabellens namn.
I den här vyn av kundtabellen, som visas i figuren nedan, visas fälten (kolumnerna) överst i fönstret och raderna eller posterna visas nedan. Denna vy liknar hur ett kalkylblad skulle utformas.
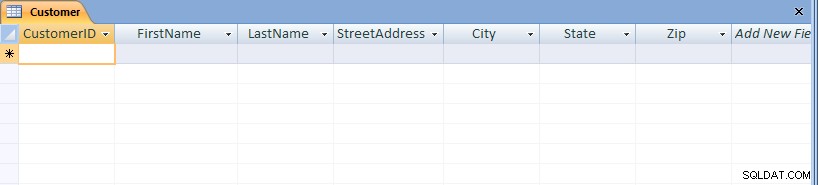
Notera längst ner i fönstret att antalet poster visas. I det här fallet, eftersom tabellen precis skapades, visas bara en tom post.
För att lägga till data i tabellen, skriv helt enkelt in värden för vart och ett av fälten (kolumnerna). Tryck på tabbtangenten för att flytta mellan fält inom en post. Använd upp- och nedpiltangenterna för att flytta mellan poster. Ange data enligt nedan:
| Kund-ID | Förnamn | Efternamn | Gatuadress | Stad | Stat | Zip |
|---|---|---|---|---|---|---|
| 1001 | Joseph | Smith | 123 Lexington | Smithville | KY | 91232 |
| 1002 | Alberta | Jones | 12 Davis Ave. | Smithville | KY | 91232 |
| 1003 | Nathanial | Yxa | 443 Grinder Ln. | Broadville | GA | 81992 |
| 1004 | Paulina | Builder | 661 Parker Rd. | Streetville | GA | 81990 |

För att spara den nya datan, dra ned Office-menyn och välj Spara.
För att navigera till andra poster i tabellen, använd navigeringsfältet längst ned på skärmen:
För att ändra befintliga data, navigera helt enkelt till intresseregistret och flik till lämpligt fält. Använd piltangenterna och delete- eller backstegstangenterna för att ändra befintliga data.
För att radera en post, navigera först till posten av intresse. Dra sedan ned menyn Redigera och välj menyalternativet Ta bort.
För att stänga tabellen och återgå till Access-huvudskärmen, dra ned Arkiv-menyn och välj menyalternativet Stäng.
5.4 Övning:Lägga till data i en tabell
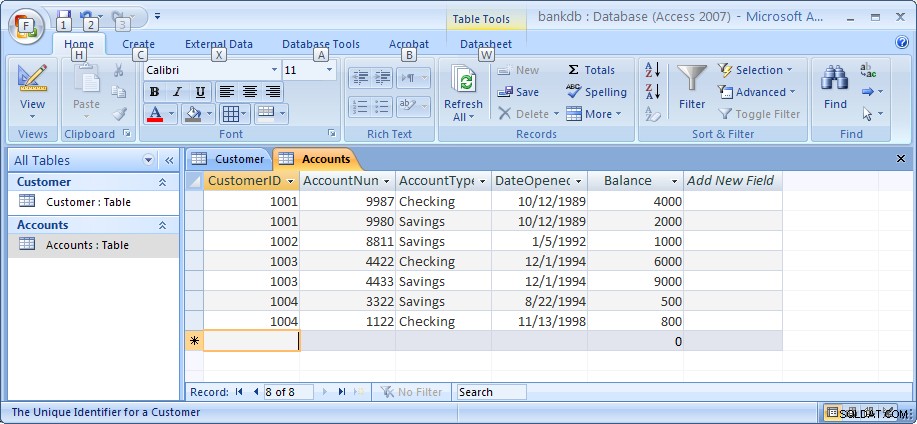
För den här övningen, öppna tabellen Konton och lägg till data för de sju konton som visas i avsnitt 2. Var noga med att ange data exakt så som visas inklusive versaler av data i fältet AccountType. t.ex. skriv Sparar istället för sparande eller SPARA.
Observera att när du anger datum, skriv in hela fyra siffror för året. Som standard visar Access alla fyra siffror i året (äldre version av Access visade endast två siffror).
Se till att spara data när du är klar. Bilden nedan visar kontotabellen och data som den ska visas när du är klar med den här övningen.
Vid denna tidpunkt i handledningen har vi skapat två tabeller, kunder och konton, och lagt till data till var och en. I de efterföljande avsnitten kommer vi att täcka hur man frågar och rapporterar om data i tabellerna och hur man skapar ett användarvänligt datainmatningsformulär med hjälp av Access-guiderna.
Obs:Min handledning om MS Access Advanced Table Design finns på den här länken. Du kanske vill kolla in det efter att du har slutfört resten av den här handledningen.
5.5 Skapa relationer mellan tabeller
Kom ihåg att en av de viktigaste egenskaperna hos relationsdatabaser är det faktum att alla tabeller är relaterade till varandra. I Bankdatabasen så här långt är Kundtabellen relaterad till Kontotabellen genom att KundID-fältet visas i båda tabellerna. Access har ett sätt att göra denna relation explicit med hjälp av relationsskärmen. Access använder denna information vid utformning av rapporter, formulär och frågor som kräver att mer än en tabell visas.
För att komma igång, se till att både kontotabellen och kundtabellen är stängda. Åtkomst kommer att stoppa skapandet av alla relationer om tabellen för närvarande är öppen. För att stänga en tabell, antingen högerklicka på tabellnamnet på fliken ovanför tabellen och välj menyalternativet stäng, eller klicka på det lilla Xet till höger ovanför tabellen.

Visa sedan Relationsskärmen genom att klicka på fliken Databasverktyg och klicka sedan på Relationsknappen som visas nedan. 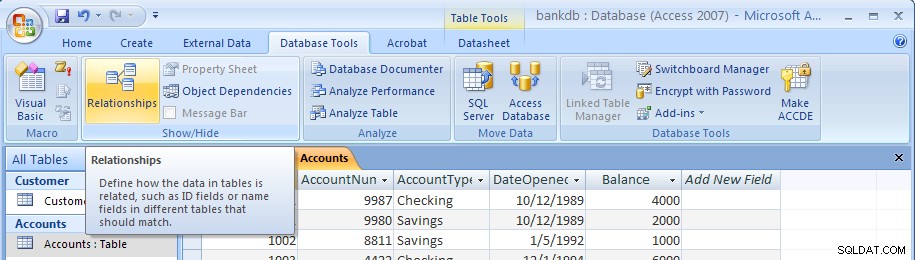
Den tomma relationsskärmen visas enligt följande:
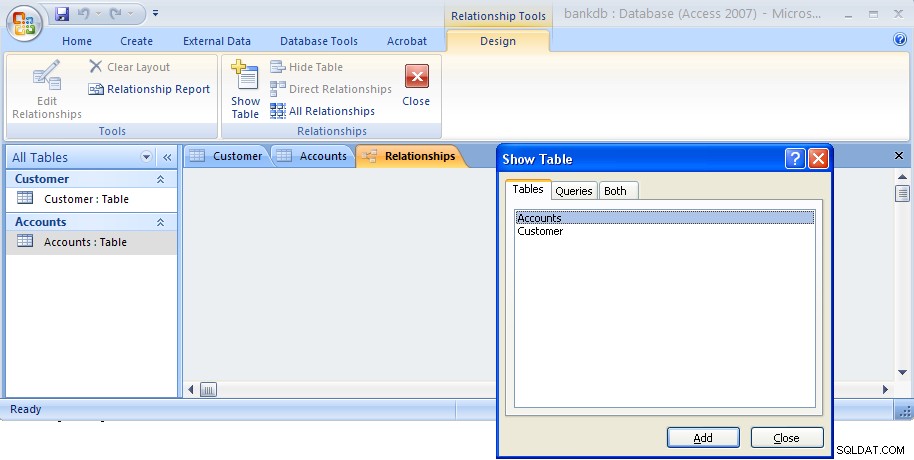
Dialogrutan Visa tabell visas som standard. Markera både Kundtabellen och Kontotabellen enligt nedan och klicka sedan på knappen Lägg till.

Klicka sedan på knappen Stäng för att stänga den här dialogrutan. Skärmen Relationer kommer nu att visas igen med de två tabellerna som visas nedan:
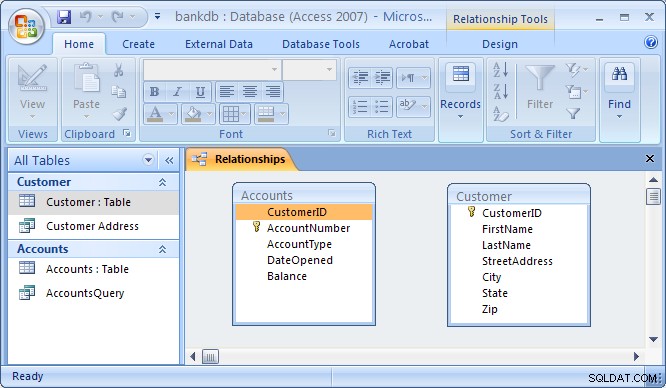
För att koppla ihop tabellen Kunder med tabellen Konton för att bilda en relation, klicka på Kund-ID-fältet i Kund-tabellen och dra det över Kund-ID-fältet i Konto-tabellen. Upon releasing the mouse button, the Edit Relationships dialog box will appear as below:
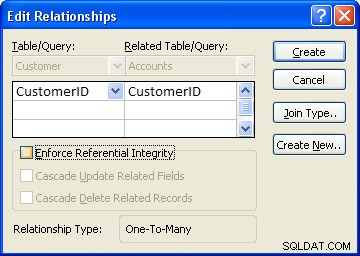
Access will do its best to determine the Relationship Type (almost always it will select One-to-Many ). For this example, Access knows that CustomerID is a key of the Customer table so it chooses this field as the “One” side. This makes the Accounts table the “Many” side as One customer may have Many accounts.
One additional step to be taken is the check off the box labeled “Enforce Referential Integrity”. This option puts constraints into effect such that an Accounts record can not be created without a valid Customer record, and Access will also prevent a user from deleting a Customer record if a related Accounts record exists. At this point, click on the Create button to create the relationship. The Relationships screen should reappear with the new relationship in place as follows:
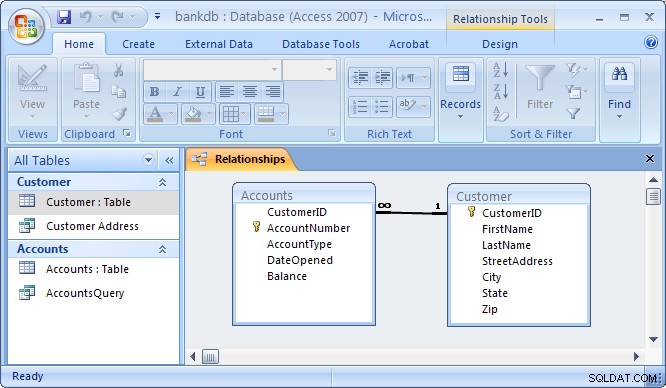
Note the symbols “1” (indicating the “One” side) and the infinity symbol (indicating the “Many” side) on the relationship. Close the relationships screen and select Yes to save the changes to the Relationships layout.
If the relationship does not appear in the above fashion, highlight it and press the delete key to delete it. Then go back to the table design view and make certain that the CustomerID field is designated as the key of the Customers table. Then go back to the Relationships screen and try to recreate the relationship.
5.6 Review of Creating and Viewing Tables
Creating a new table requires the following steps:
- Click on the Tables tab on the Access main screen
- Click on the New button.
- Choose the Design View and click the OK button.
- Fill in the name, data type and description of each of the fields in the table.
- Designate a primary key by clicking on one of the fields with the right mouse button and then choose Primary Key from the pop-up menu.
- Save the table by pulling down the File menu and choosing Save.
- Close the new table by pulling down the File menu and choosing Close.
To change the design of an existing table (e.g., to add, change or delete a field):
- Click on the Tables tab on the Access main screen
- Highlight the name of the table to be modified and click on the Design button.
- Make the necessary changes.
- Save the table by pulling down the File menu and choosing Save.
- Close the table by pulling down the File menu and choosing Close.
To add, delete or change data in an existing table:
- Click on the Tables tab on the Access main screen
- Highlight the name of the table to be modified and click on the Open button.
- Make the necessary changes to the data.
- Save the table data by pulling down the File menu and choosing Save.
- Close the table by pulling down the File menu and choosing Close.
To create or edit relationships between tables:
- Pull down the Tools menu and select the Relationships menu item.
- To display tables, right click and choose Add Tables
- To create new relationships, drag a key field from one table and drop it on the associated field in another table
- To edit an existing relationship, double click on the relationship line.
- To delete an existing relationship, click on the relationship line and press the delete key.
6 Creating and Running Queries
Queries are a fundamental means of accessing and displaying data from tables. Queries can access a single table or multiple tables. Examples of queries for our bank database might include:
- Which Customers live in Georgia ?
- Which Accounts have less than a $500 balance ?
- What is the total amount of money deposited by each Cusomter?
- Which Checking account has the largest balance?
Queries can be used to carry out other tasks such as for creating formatted reports and data entry forms, and for exporting subsets of data to Excel or another software program.
In this section, we show how to use the Access Wizards to create queries for a single table and for multiple tables.
6.1 Single Table Queries
In this section, we demonstrate how to query a single table. Single table queries are useful to gain a view of the data in a table that:
- only displays certain fields (columns) in the output
- sorts the records in a particular order
- performs some statistics on the records such as calculating the sum of data values in a column or counting the number of records, or
- filters the records by showing only those records that match some criteria. For example, show only those bank customers living in GA.
Creating a query can be accomplished by using either the query design view or the Query wizard. In the following example, we will use the query wizard to create a query.
To create a new query, click on the Create tab. Then click on the Query wizard button.
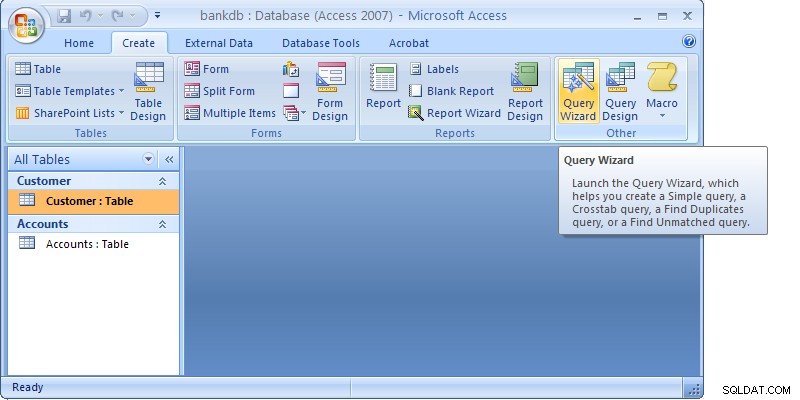
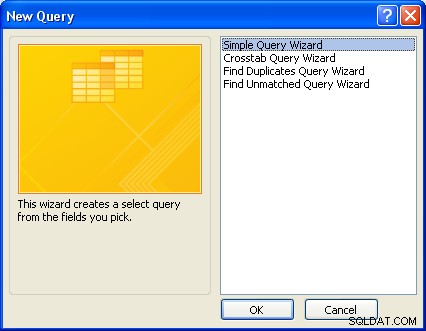
When the Query wizard appears, highlight the Simple Query Wizard selection and click on the OK button.
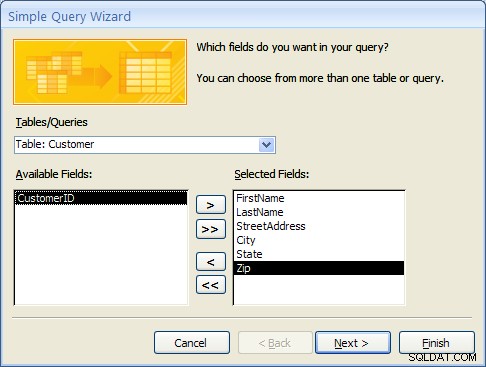
The first step in the Simple Query wizard is to specify the table for the query and which fields (columns) should be displayed in the query output. Three main sections of this step are:
- Tables/Queries – A pick list of tables or queries you have created.
- Available Fields – Those fields from the table that can be displayed.
- Selected Fields – Those fields from the table that will be displayed.
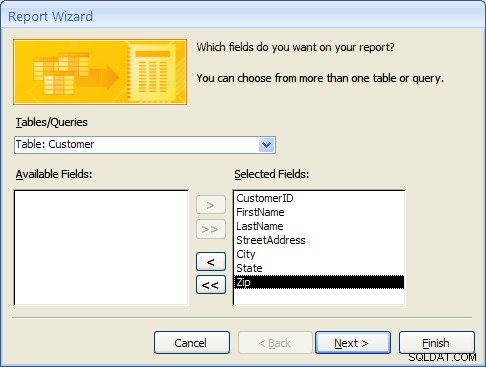
For this example, pull down the Tables/Queries list and choose the Customer table. Notice that the available fields change to list only those fields in the Customer table. This step is shown below:

From the list of Available fields on the left, move the FirstName, LastName, StreetAddress, City and State fields over to the Selected Fields area on the right. Highlight one of the fields and then click on the right arrow button  in the center between the two areas. Repeat this for each of the four fields to be displayed. When done with this step, the wizard should appear as below:
Click on the Next button to move to the next and final step in the Simple Query wizard.
In the final step, give your new query a name. For this example, name the query:Customer Address
At this point, the wizard will create the new query with the option to either:
- Open the query to view information – that is, the wizard will execute the query and show the data.
- Modify the query design – the wizard will switch to the Design View to allow further modification of the query.
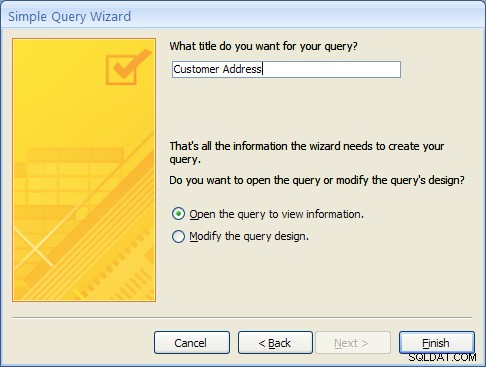
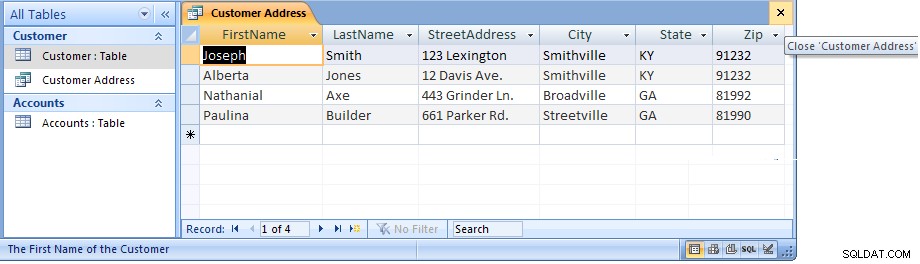
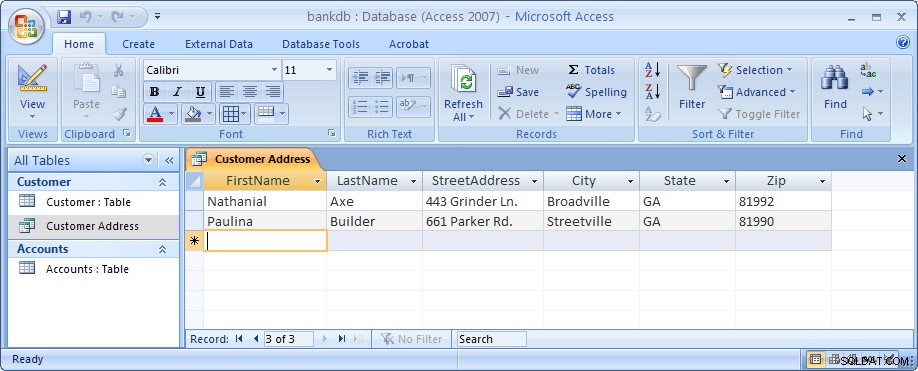
For this example, choose Open the query to view information and click on the Finish button. When this query executes, only the customer’s name, address, city and state fields appear, however, all of the rows appear as shown in the figure below:

Close this query by clicking on the X in the upper right corner of the query results as shown in the figure below:
The Access main screen showing the Queries tab should appear. Note the new query Customer Address appears under the Customers table.
6.1 Single Table Queries (Continued)
In the following example, we will modify the Customer Address query to only display customers in a certain state. To accomplish this, we will make use of the Query Design View.
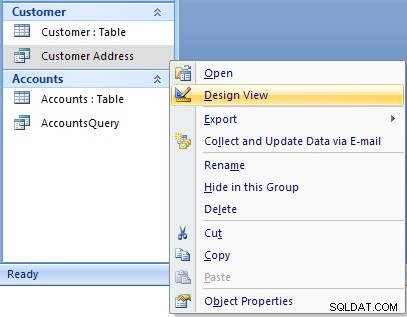
Open up the Customer Address query in the design view by right-clicking on the name of the query. Then select the Design View menu item as shown below.
The design view will appear as in the figure below:
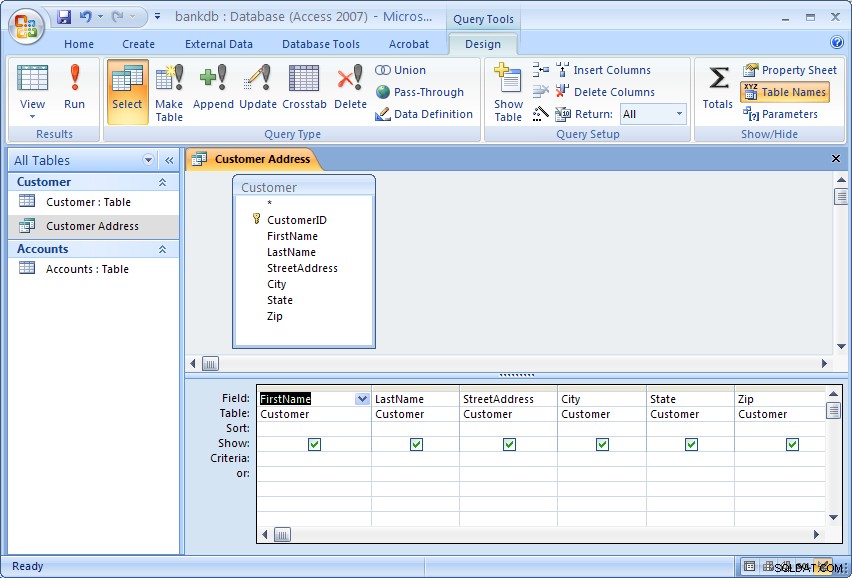
The Query Design view has two major sections. In the top section, the table(s) used for the query are displayed along with the available fields. In the bottom section, those fields that have been selected for use in the query are displayed.
Each field has several options associated with it:
- Field – The name of the field from the table
- Table – The table the field comes from
- Sort – The order in which to sort on this field (Ascending, Descending or Not Sorted)
- Show – Whether or not to display this field in the query output
- Criteria – Indicates how to filter the records in the query output.
For this example, we will filter the records to only display those customers living in the State of Georgia (GA). We will also sort the records on the City field.
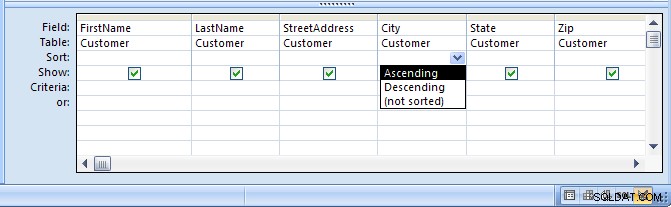
To sort the records on the City field, click in the Sort area beneath the City fält. Choose Ascending from the list as shown in the figure below:
To filter the output to only display Customers in Georgia, click in the Criteria area beneath the State field and type the following statement: ='GA'
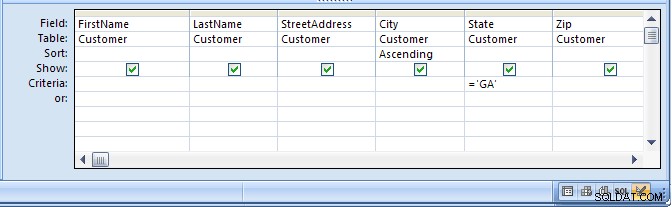
The ='GA' statement tells Access to only show those records where the value of the State field is equal to ‘GA’. Note the use of single quotes to surround the characters.
Run the query by clicking on the Run button (with the large red exclamation point). The output is shown in the figure below:
Finally, save and close this query to return to the Access main screen.
6.2 Exercise:Single Table Queries
For this exercise, use the Simple Query wizard to create a query on the Accounts table showing just the AccountNumber, AccountType and Balance fields.
- From the Access main screen, click on the Create tab. Then click on the Query Wizard button.
- Choose the Simple Query wizard option and click on the OK button.
- Under Table/Queries:choose the Accounts table. Then move the AccountNumber, AccountType and Balance fields over to the Selected fields area. Then click the Next button.
- In the next panel, you will be asked to choose between a detail or summary query. Choose detailed query and click on the Next button.
- Name the new Query :AccountsQuery and click on the Finish button.
The output is shown below:

Close this query by pulling down the Office menu and choosing Close.
In the next part of the exercise, we will modify the query to sort the output on the account number and only display the Savings accounts.
- From the Queries tab on the Access main screen, highlight the AccountsQuery and click on the Design button.
- Change the Sort order for the AccountNumber field to Ascending.Add the following statement to the Criteria:are under the AccountType field:=‘Savings’
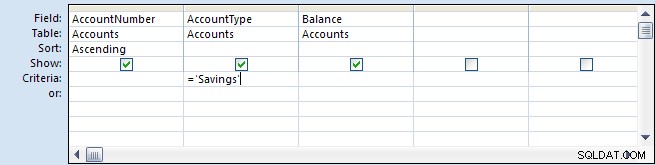
- Run the query by double-clicking on the AccountsQuery name. The output is shown below:
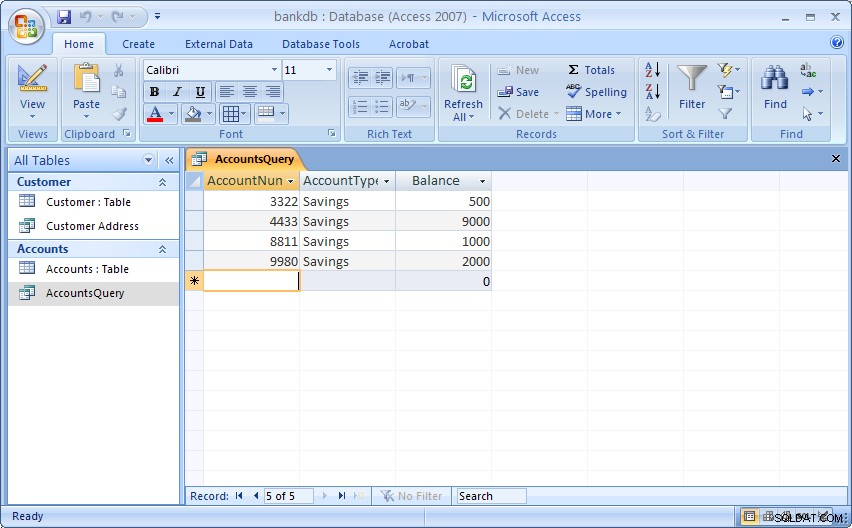
- Finally, save and close the query to return to the Access main screen.
6.3 Multiple Table Queries
Up to this point, queries involving only one table have been demonstrated. It is almost a given that queries will need to involve more than one table. For this example, assume that a manager would like to see a list of all of the customers and the type of account(s) that each one maintains at the bank. Such a query requires data from both the Customers table as well as the Accounts table. In such queries, Access will rely on the Relationships established between tables to guide how the data will be assembled to satisfy the query.
Before proceeding with these next instructions, make certain the One-to-Many relationship between the Customers and Accounts table has been created (see section 5.5 Creating Relationships for a review of this process).
To start the process of creating a multiple table query, highlight the Create tab and click on the Query Wizard button to create a new query. Select the “Simple Query Wizard” option as was done previously.
When the simple query wizard appears, select the CustomerID and LastName fields from the Customers table, then switch the Tables/Queries selection to the Accounts table and select the CustomerID, AccountType and Balance fields from the Accounts table. The result from this step is down below:
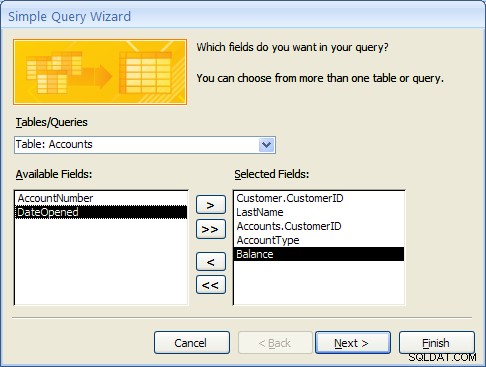
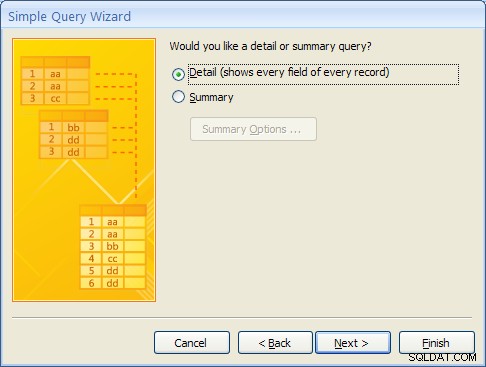
Click the Next button to continue. In the next step of the wizard, an option will appear to provide some level of Summary. For this example, leave the default at “Detail …” as shown below and then click on the Next button.
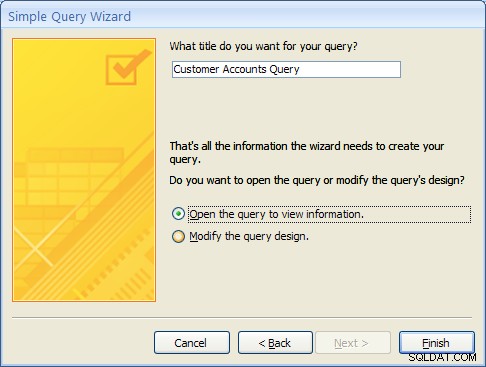
In the final step of the wizard, name the query “Customer Accounts Query” and click on the Finish button. The multiple table query results should appear as follows:
MS Access knows how to line up (or “join”) the accounts table to the Customer table for this query due to the relationship that was created when the tables were first defined.
As with single table queries demonstrated previously, one can change the query definition in design view by adding filters (e.g., show account information for all customers in ‘GA’).
6.4 Exercise:Multiple Table Queries
For this exercise, create a new query called “Accounts Summary Query” that joins the Customers table (include the CustomerID and LastName fields) with the Accounts table (include the Balance field only). In the second step of the wizard, click on the Summary choice (instead of Details) and then click on the Summary Options… button. Check off all of the Summary option boxes such as Sum , AVG , Min and Max as shown in the figure below:
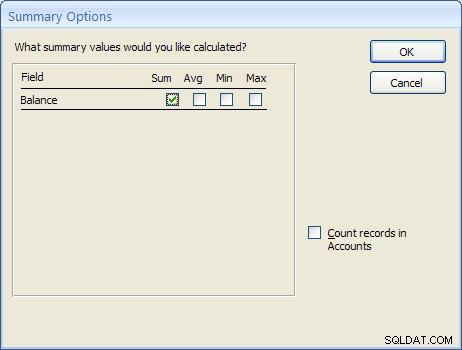
The resulting query should appear as follows:
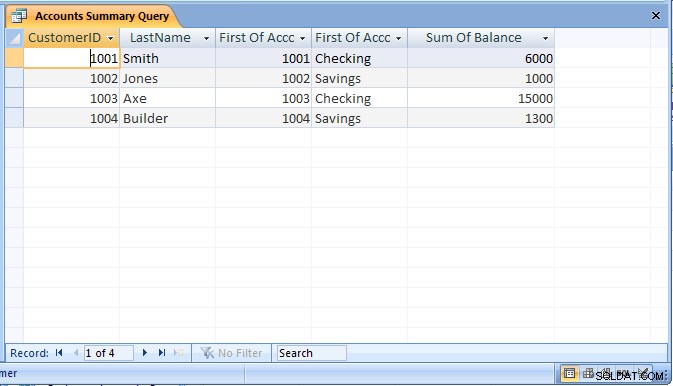
Be sure to save the query as “Accounts Summary Query”.
6.5 Review of Creating and Running Queries
In this section, the basic steps for creating and running queries were introduced. The query wizard can be used to create simple queries that access a single table. It is also possible to then modify the query to sort or filter the records.
Creating a query using the query wizard:
- From the Access main screen, click on the Queries tab. Then click on the New button.
- From the Queries tab on the main Access screen, click on the New button and choose the Simple Query wizard option.
- Under Table/Queries:choose the appropriate table for the query and then indicate which fields in the table will appear in the query output.If querying more than one table, change the Table/Queries:selection to display additional tables and select the necessary fields.
- If the table contains numeric fields, either detailed or summary information may be specified for the query.
- Finally, name the new query and click on the Finish button.
As a final note, Forms and Reports can be created based on existing queries.
7 Creating and Running a Data Entry Form
Data entry forms are the primary means of entering data into tables in the database. In a previous section, we described how to add data to a table using a spreadsheet-like view of the data. Data entry forms offer a more user-friendly interface by adding labels for each field and other helpful information.
Access provides several different ways of creating data entry forms. These include:
- Creating the forms by hand using a Design View
- Creating a default form based on all of the fields available in a table or a query
- Creating a form based on a number of different wizards that walk the user through the forms creation process.
As with queries, a data entry form can be based on a single table or it can work on multiple tables at the same time.
In this section, we cover the basic steps for using a wizard to create a data entry form based on a single table. After this exercise, a multiple-table form is demonstrated.
7.1 Creating a Single Table Form using the Wizard
In this example, we will create a simple data entry form for the Customer table. To begin the process, click on the Create tab on the Access main screen. As with the other components in Access, there are buttons for creating a New form, Open an existing form and Design an existing form. For this example, click on the New button to create a new form.
Several buttons for creating a new form will appear. For this tutorial, choose the Form wizard.
In the first step of the Form wizard, we need to specify the fields from the Customer table that will appear on the form. In this case, we want all of the fields to appear. Move each of the fields from the Available Fields side over to the Selected Fields side as in the following figure. Then click on the Next button.

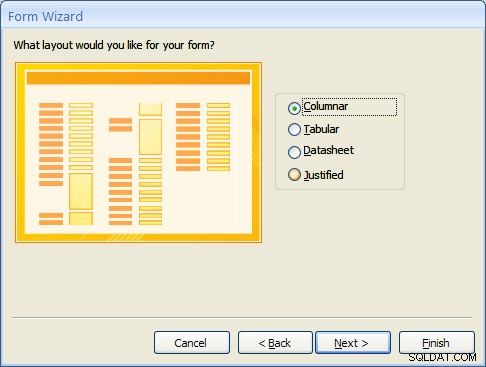
Forms can have several different layouts or arrangement of the labels and fields on the screen.
- Columnar – Places the labels to the left of each field. This is similar to a paper form. This layout is suitable for viewing data one record at a time.
- Tabular – Places the field labels at the top of the screen and the records are displayed below. This is similar to how a spreadsheet would display the data and is suitable for displaying multiple records of data at a time.
- Datasheet – The data appears in the same fashion as when viewing or adding data to a table.
- Justified – Places the labels above each field with the fields spread out on the form. This is suitable for viewing a single record at a time as with the columnar layout.
For this example, choose the columnar layout as shown in the figure below and click on the Next button.
At this point, MS Access 2007 and 2010/2013 versions are a bit different. Access 2007 will show several sample display styles that determine how the form will appear, including elements such as fonts, colors and the background used in the form. Access 2010 and 2013 skips this step in this wizard and provides styles that can be applied to the form in Design mode. For this example, for MS Access 2007, select the Office style as shown below and click on the Next button.

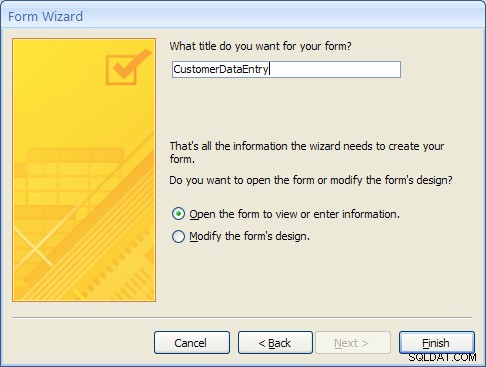
As a final step, give this new form the name:CustomerDataEntry and then click on the Finish button as shown below:
The new form will be created by the wizard and then opened. It should appear as in the figure below:
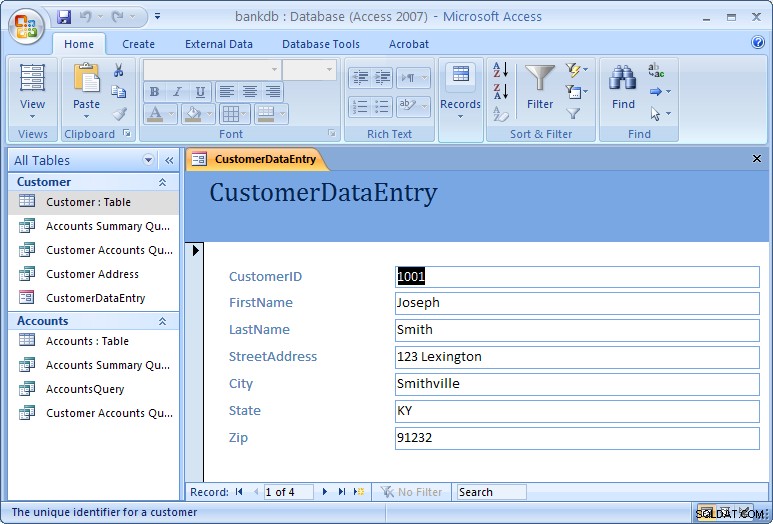
Use the tab key to navigate between fields in the form. To move to the next or previous record, use the record navigation bar at the bottom of the form:
The buttons on the navigation bar perform the following functions:
 | Go to the first record. |
 | Go to the previous record. |
 | Go to the next record. |
 | Go to the last record.  Go past the last record to add a new record. Go past the last record to add a new record. |
To close the form and return to the Access main screen, pull down the File menu and choose Close.
To open the form at any time, highlight the form name under the Forms tab on the Access main screen and click on the Open button.
One quick final note on forms. When the form is created, MS Access looks at how the table is designed and creates the form based on the properties of the table. If you make any changes to the table, you will need to re-create the form again in order to see those table changes reflected in the form. One example where this might happen is is if you change a column in your table from a text box to a combo box, or if you add or remove any columns from your table.
7.2 Exercise:Creating a Single Table Form
For this exercise, we will create a data entry form for the Accounts table created in a previous exercise.
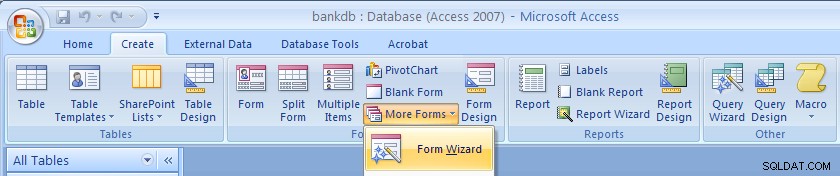
- Click on the Create tab on the Access main screen and then click on the More Forms… button and the “Forms Wizard” to create a new form.
- Select the Accounts table and all of the available fields and click on the Next button.
- Choose a Tabular layout and click on the Next button.
- For Access 2007 choose the Office style and click on the Next button.
- Name the form:AccountsDataEntry Then click on the Finish button to create, save and view the new form.
The new form is shown in the figure below:
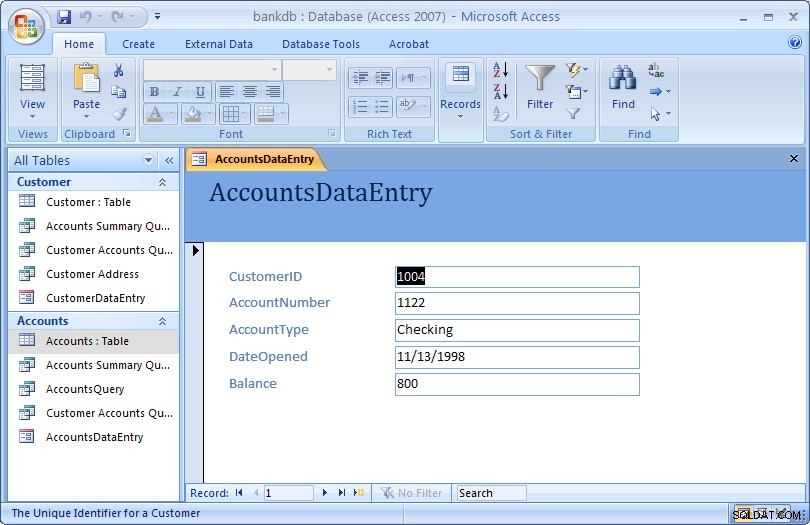
Close the form and return to the Access main screen, by pulling down the File (or Office) menu and choosing Close.
7.3 Review of Creating and Running a Data Entry Form
The basic steps for creating a simple data entry form are:
- Choose a table and a form wizard
- Specify the fields (columns) that will appear in the form
- Specify the layout for the form
- Specify the style (fonts/colors, etc.) for the form
- Save, create and run the new form
In this section we covered the basic steps required to create and run a data entry form. Access provides wizards which are adept at building simple forms with a minimal amount of work. More advanced work on forms would concentrate on using the Design View to change a form’s appearance and to add or remove fields and labels once a form is created. A more advanced tutorial on MS Access Forms Design is linked here.
8 Creating and Running a Report
Reports are similar to queries in that they retrieve data from one or more tables and display the records. Unlike queries, however, reports add formatting to the output including fonts, colors, backgrounds and other features. Reports are often printed out on paper rather than just viewed on the screen. They can also be attached to e-mail and exported and posted as web pages.
As with data entry forms, there are a number of ways to create reports in MS Access:
- A report can be created “by hand” in Design view
- A default report can be created automatically based on all of the firleds for a given table.
- A report can be created using the Create Report wizard.
In this section, we cover how to create simple reports using the Report wizard.
8.1 Creating a Single Table Report using the Wizard
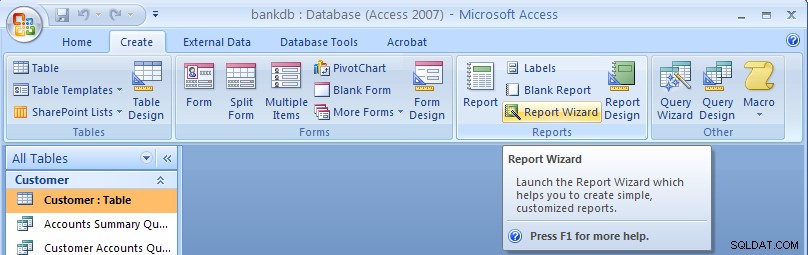
In this example, we will create a simple report for a single table using the Report wizard. As with the Queries and Forms, we begin by selecting the Create tab from the Access main screen.
To create a new report, click on the Report Wizard button.
In the next step of the Report wizard, is used to specify the fields from the Customer table that will appear on the report. In this case, we want all of the fields to appear. Move each of the fields from the Available Fields side over to the Selected Fields side as in the following figure. Then click on the Next button.
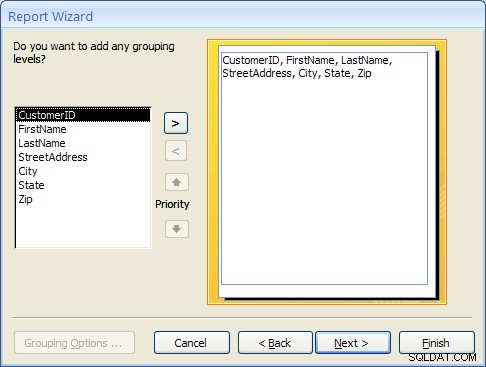
In the next step, we have the opportunity to add Grouping Levels to the report. A grouping level is where several records have the same value for a given field and we only display the value for the first records. In this case, we will not use any grouping levels so simply click on the Next button as shown below.
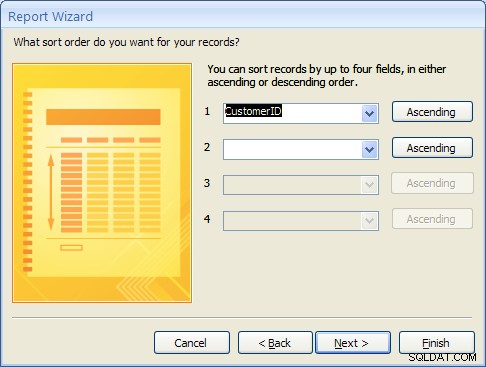
In the next step, the sorting order of the report can be specified. For this example, we will sort the records on the CustomerID field. To achieve this, pull down the list box next to the number 1:and choose the CustomerID field as shown in the figure below. Then click on the Next button.
8.1 Creating a Single Table Report using the Wizard (Continued)
The next step is to specify the layout of the report. The three options are:
- Columnar – Places the labels to the left of each field. This is similar to a paper form.
- Tabular – Places the field labels at the top of the report page and the records are displayed below. This is similar to how a spreadsheet would display the data.
- Justified – Places the labels above each field with the fields spread out on the report page.
Generally, reports use the tabular layout. For this example, choose Tabular layout and set the page Orientation to Landscape so that all of the fields will fit across one page. This is shown in the figure below. Click on the Next button to continue.

In the next step, the style of the report can be selected. For this example, choose the Office style and click on the Next button to continue.

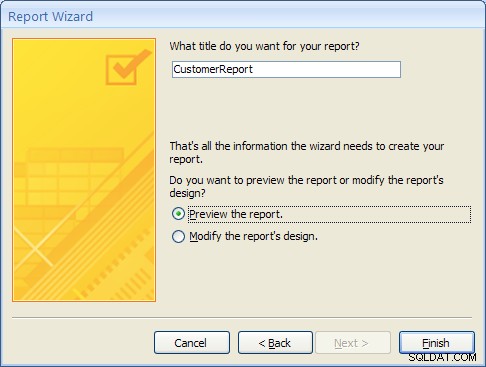
Finally, give a name for the new report:CustomerReport and then click on the Finish button to create, save and display the new report.
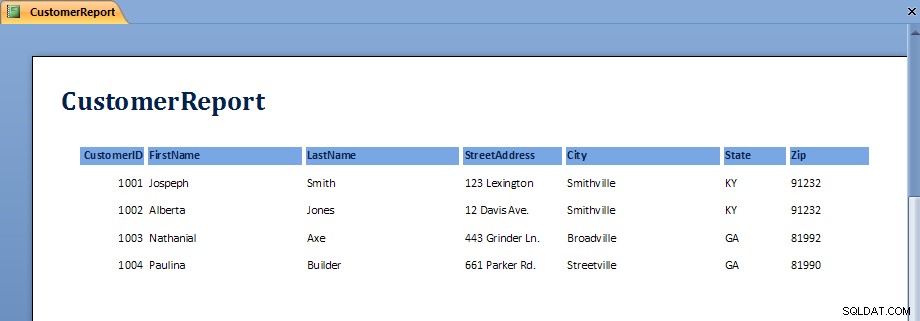
The output from the report is shown in the figure below. Note that on some screens, the last field, Zip, may not display without scrolling over to the right.
Once the report is displayed, it can be viewed, printed or transferred into Microsoft Word or Microsoft Excel. The button bar across the top of the screen has the following functions:
 | Print the report |
 | Zoom into a region of the report |
 | Display the report as one, two or multiple pages |
 | Zoom into or out of the report |
 | Transfer the report into MS Word |
 | Close the report |
To close the report and return to the Access main screen, click on the Close button.
8.2 Exercise:Creating a Single Table Report
For this exercise, we will create a report showing all of the Accounts information.
- From the Access main screen, click on the Create tab and Click on the Report wizard.
- Select all of the fields in the Accounts table by moving them all over to the Selected Fields side and then click Next
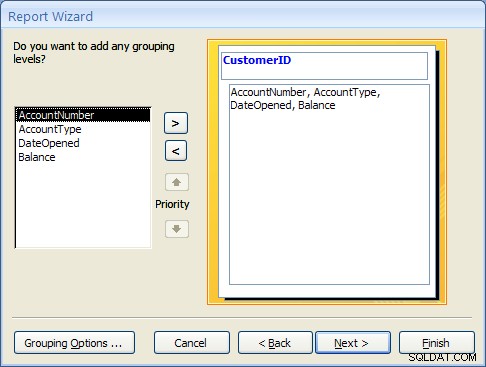
- Group the report by CustomerID by clicking on the CustomerID field and then clicking on the right arrow button. This is shown in the following figure:
Click on the Next button to continue. - Choose to sort the report on the AccountNumber fält. Note that a new button will appear called Summary Options.
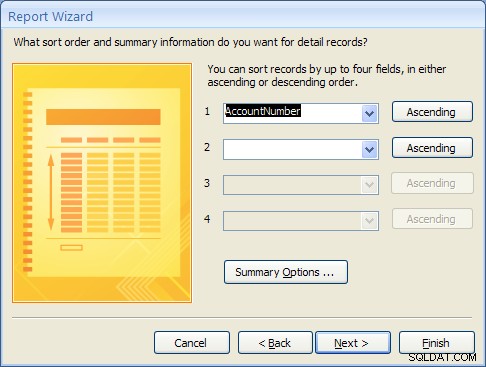
Click on the Summary Options button. Choose the Balance field and select the Sum option. Choose the option to show both Detail and Summary data. Then click on the OK button.

Click on the Next button. - Choose a Block layout and click on the Next button.
- Choose the Corporate style and the click on the Next button.
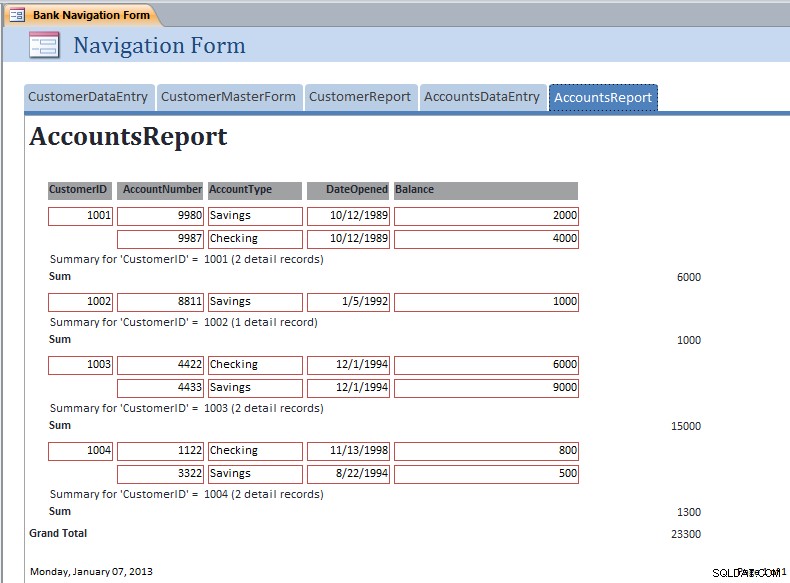
- Finally, name the report:AccountsReport and click on the Finish button to create, save and run the report.
The output from the AccountsReport is shown below:
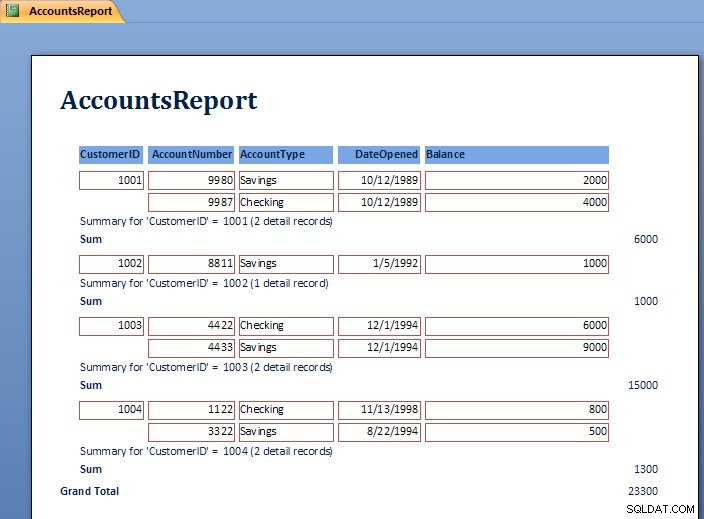
Note the Grouping at the level of the CustomerID and the Sum for each customer’s balances.
To close the report and return to the Access main screen, pull down the File menu and choose Close.
8.3 Review of Creating and Running a Report
As can be seen in the report exercise, there are many ways to create reports to show summation, sorting and layout of the data. Further study of Reports will show how to modify the layout using the Design View. Students are encouraged to work with the Report wizards to create different styles and types of reports.
9 Creating and Running a Master/Detail Form
Master/Detail forms are used to display data from two tables at the same time. MS Access calls the “details” a “subform”. The forms are linked according to the relationship between the tables. Recall that in the example database, the CustomerID is used to link the Customer table (Master) to the Accounts table (Detail). In this section a master / detail form for the Customer and Accounts tables will be created.
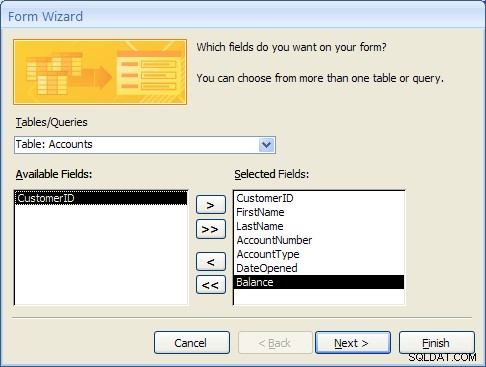
- From the Access main screen, click on the Create tab and Click on the “More Forms…” section and finally the “Forms Wizard”.Select the Customer table first and move the CustomerID, FirstName and LastName fields to the Selected Fields list.Next, select the Accounts table and move the AccountNumber, AccountType, DateOpened and Balance fields to the Selected Fields list as shown below.
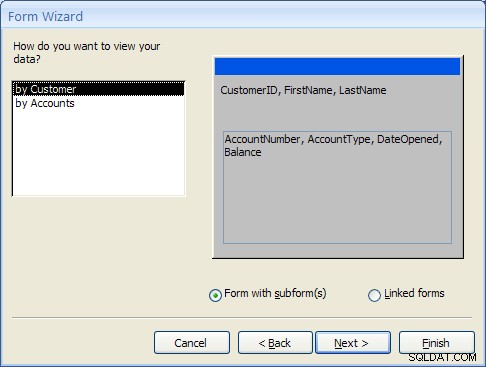
Click the Next… button to move to the next step. - At this point MS Access detects that this form will involve data from two different tables. The first prompt asks how the form should be organized at the top or “Master” level. The “by Customer” selection should be highlighted.The second prompt asks how the forms should be created. For this example, select “Form with Subform(s)” as shown below and click the Next… button to move to the next step.
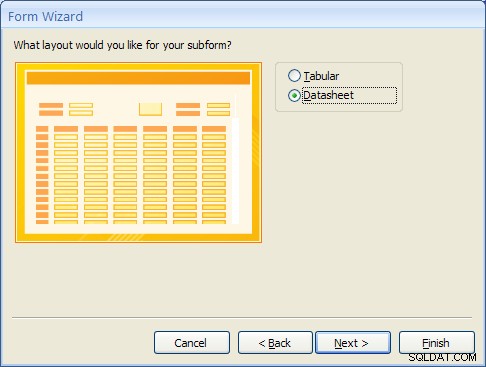
- The Subform is the form that will display the detailed data from the Accounts table. Selecting the “Datasheet” layout will make it easy for the user to view the multiple accounts a Customer may have. Select “Datasheet” and click the Next… button to move to the next step.
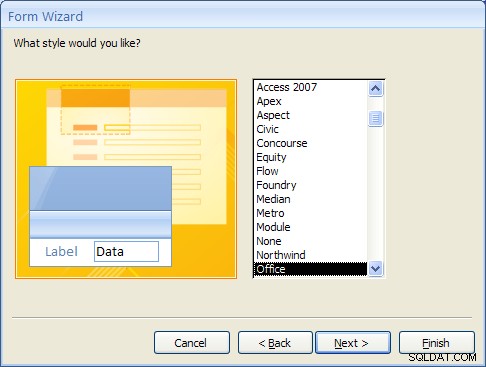
- For Access 2007, select the Office style and click the Next… button to move to the next step. (This step will not appear in MS Access 2010 or 2013).
- Finally, give the main form the name “CustomerMasterForm” and the Subform the name “Accounts Subform”.
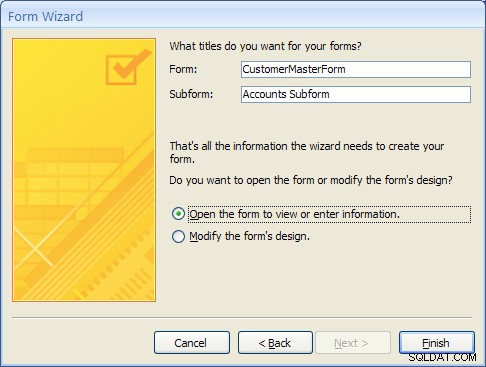
- After clicking on the Finish button the new Master/Detail form will appear as shown below.
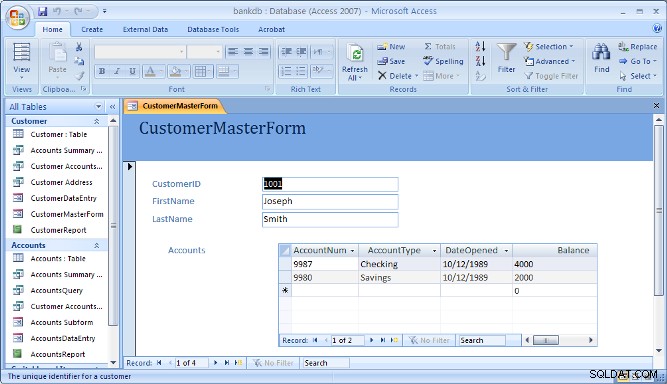
Note that the navigation bar at the bottom of the form is used to navigate through the records in the Master (or top) part of the form.
10 Creating and Running a Switchboard
A Switchboard is a type of form that displays a menu of items that a user can click on to launch data entry forms, reports, queries and other actions in the database. A switchboard is typically created after all of the forms and reports for a database application have been completed. It can be used to guide the user to an appropriate set of forms and reports.
Note that starting with Access 2010, Switchboards are not available by default (you will need to add this to the ribbon bar manually using the Options). Access 2010 and 2013 make use of the Navigation Forms.
In this section, a default switchboard will be created.
- From the Access main screen, click on the Database Tools tab and Click on the Switchboard Manager as shown in the figure below.

If this is the first switchboard made for this database, you will be prompted to create a new one as shown below. Click the Yes button.

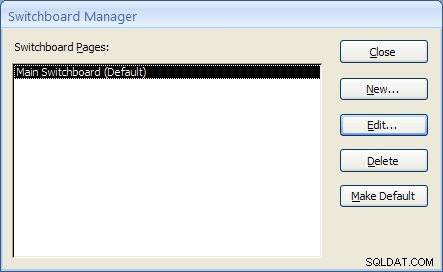
- The Switchboard manager will appear as shown below:
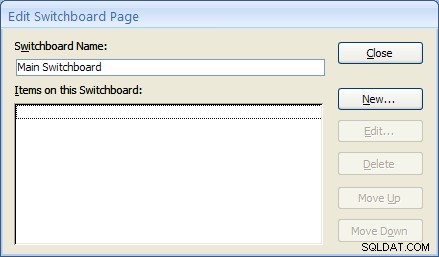
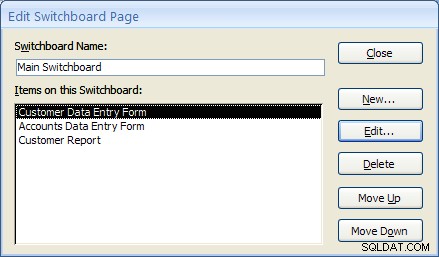
- Click on the Edit menu to edit the “Main Switchboard”. The Edit Switchboard Page will appear as shown below:
- Add a new switchboard item by clicking on the New… button. The Edit Switchboard Item form will appear as shown below. Fill in the fields as follows:
Text: Customer Data Entry Form Command: Select Open Form in Edit Mode from the drop down list. Form: Select the “CustomerDataEntry” form from the drop down list. 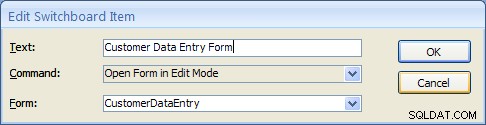
Click on the OK button to save this new Switchboard item.
- Repeat the above step two more times to add Switchboard items for the Accounts DataEntry form and the Customer Report.
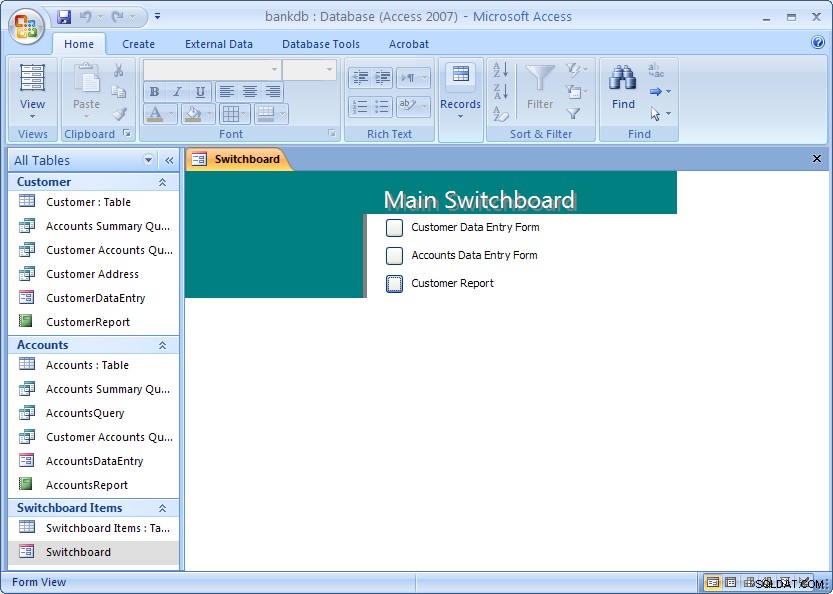
Once completed, click the Close button. Then click the Close button once more to close the Switchboard manager. - From the main MS Access screen look for a new section labeled Switchboard items. To view the switchboard, double-click on name “Switchboard”.
The next section covers creating a Navigation Form which is the recommended navigation screen for MS Access 2007, 2010 and newer versions.
11 Creating and Running a Navigation Form
MS Access 2010 introduced a new form called a Navigation Form. Navigation forms take the place of Switchboards but provide much the same functionality. Namely, they are designed to give the user the ability to run forms and reports without having to hunt through all of the different menus and lists objects. Typically a database application will have one main Navigation form that will appear when the database is opened.
In this section, the basic steps for creating and running a Navigation Form in MS Access 2010 will be demonstrated.
A Navigation Form is another type of form in MS Access 2010 and 2013
- To get started, click on the Create tab on the Access 2010 or 2013 ribbon bar. Under the section for Forms look for the item labeled Navigation Form. Note that this may be located on the button labeled Other Forms.
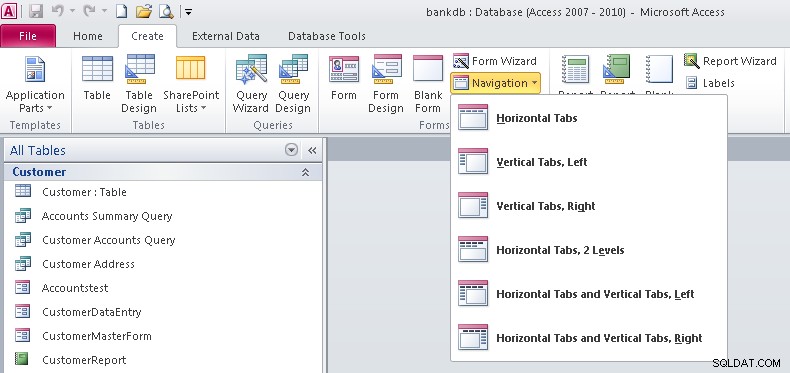
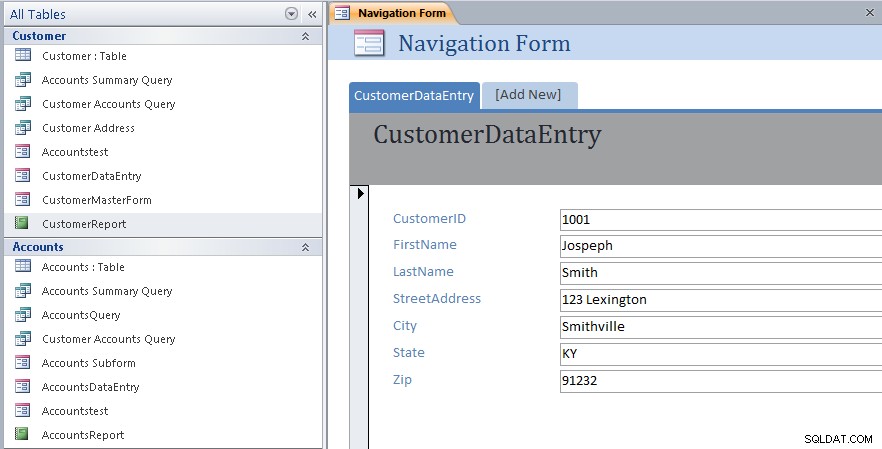
- Note that there are 6 different default styles of Navigation Forms. Each one places the buttons in a different configuration on the screem. Buttons can be aligned across the top, either side or some combination.For this tutorial select the Horizontal Tabs configuration which appears as the first item on the list.
- At this point a new Navigation Form will be created with a row of tabs across the top. The first tab will be labeled [Add New]
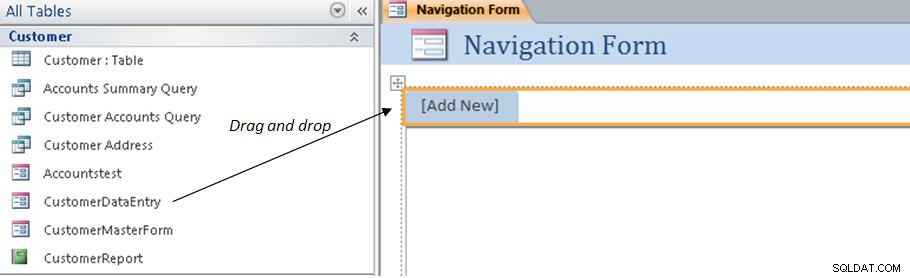
- To add items to the Navigation form, drag the items from the list on the left over to the spot on the Navigation Form labeled [Add New]. This is shown by the arrow in the above figure. For example, drag over the CustomerDataEntry form to the Navigation Form. The result is shown below.
- Next drag and drop the CustomerMasterForm as shown below.

- Next drag and drop the CustomerReport as shown below.
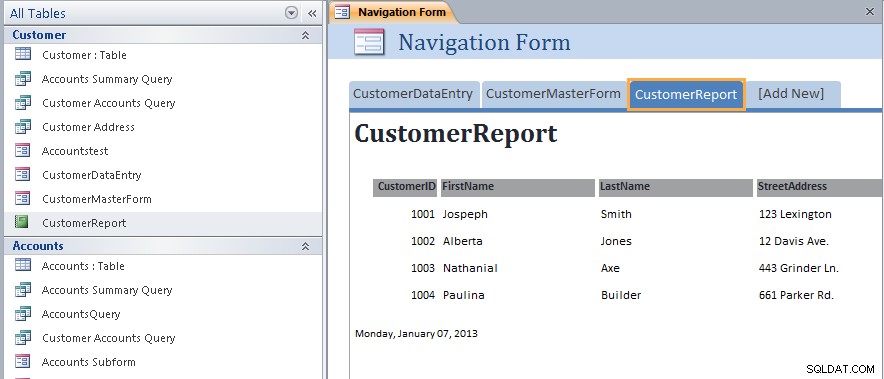
- At this point we have created a new navigation Form and added three items along the top of the page. Save the Navigation Form by right-clicking on the name of the form and choosing Save as shown below:
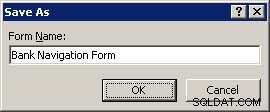
- Name the Navigation Form:Bank Navigation Form and click the OK button.
- Close up the Navigation Form by right-clicking again on the name of the form and choosing Close menu item.At this point the new Navigation Form has been created and saved. The next step will be to view the Navigation Form and navigate the different forms and reports linked to it.
- To view the Navigation Form, look for the Unrelated Objects group on the left side of the screen. Double click on the Bank Navigation Form item as shown below:
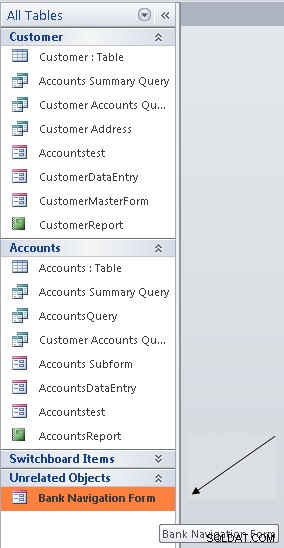
The Navigation Form will appear: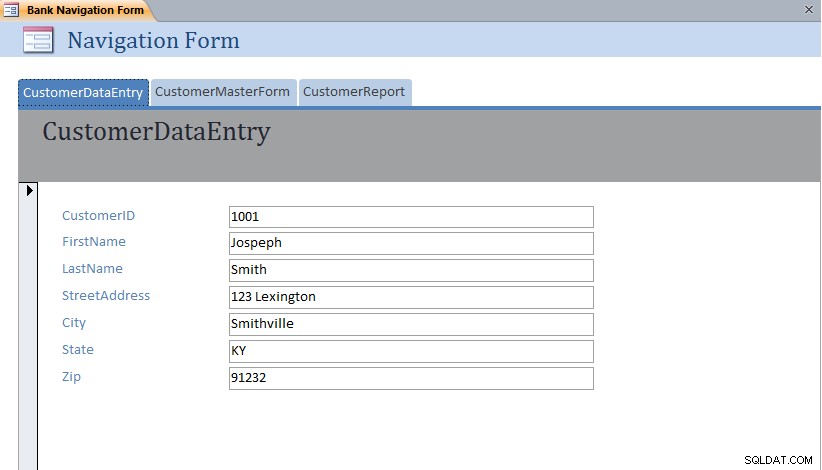 Note that each form or report can be displayed simply by clicking on the different tabs across the top of the Navigation Form.
11.1 Exercise:Modifying a Navigation Form
For this exercise, edit the Bank Navigation Form in Layout View and add the following new items to the Navigation Form:
- AccountsDataEntry
- AccountsReport
The resulting Navigation Form should appear as below with the AccountsReport opened:
11.2 Setting the Navigation Form as the Default
MS Access 2007 and 2010 (as well as earlier versions) have the ability to set a default form that will open up automatically once the MS Access data file is opened. This is especially useful for end users so that they always see the same form when they open up the database.
To set the Default Form, pull down the File menu and select the Options menu item.

The Database Options form will appear. Click on the Current Database item on the left hand side.
Under the Application Options heading, look for the Display Form:prompt and set this to the Bank Navigation Form as shown below:
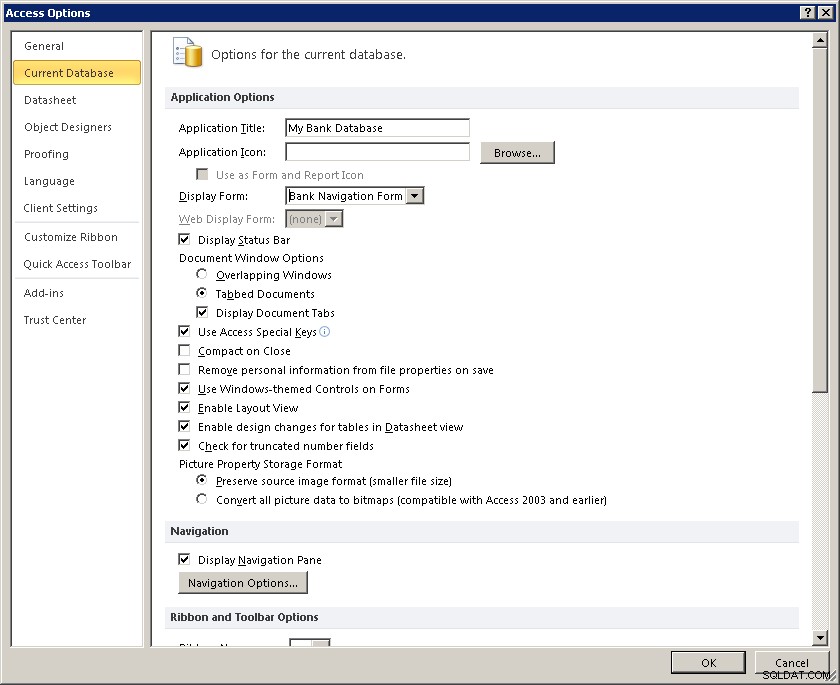
Click on the OK button to close up the Database Options screen.
The next time this database (bankdb.accdb) is opened, the Bank Navigation Form will open up.
12 Tutorial Summary
In this tutorial, we have covered the basics for creating an Access database including tables with data, queries to retrieve data, forms to enter data and reports to display and summarize data.
Students are encouraged to further their Access knowledge and skills by working through more advanced tutorials such as Advanced Access Database Table Design and Advanced Access Forms Design, and by reading the on-line help and Access documentation.
You may also be interested in this tutorial that covers up-sizing the Access database to Microsoft SQL Server using the Microsoft SQL Server Migration Assistant.